


This Biniboo Quiet Book Car Trip page is great for problem-solving skills, cause-effect concept, and fine motor skills.
If you just started planning your quiet book, I suggest you read the Quiet book Guide, where you can find out how to choose the best activity pages for your child and what is the general procedure of making a quiet book.
You can create this activity page with the sewing method only. I recommend you make this activity on the fabric page base. I kindly suggest you read an article on how to sew felt in quiet books correctly.

QUIET BOOK CAR TRIP PAGE
SEWING INSTRUCTIONS
STEP 1
If you haven’t already, first, create a fabric page base. Download and print the FREE PDF Car Trip Quiet Book Pattern for this activity and cut out all the shapes. You can find the pattern at the bottom of the page.
Put the paper pieces on a stiff felt, transcribe them, and then cut them out from felt. If you don’t want to waste hours searching for all the materials you need and transcribing and cutting the felt, check my DIY store where you can buy a pre-cut DIY kit for this activity page.
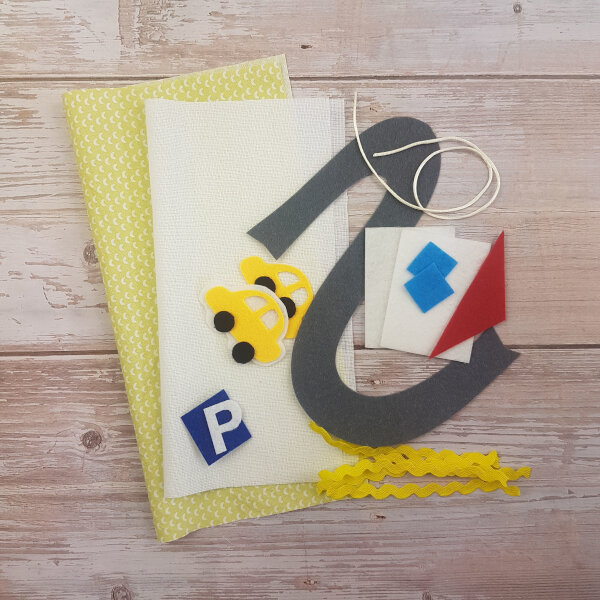
Check if you have everything you need to make Quiet Book Car Trip page.
STEP 2
Sew two blue windows on the white felt. Put the needle in the left position.


STEP 3
Put the cord in between the white and yellow felt, which are in the shape of a car. Sew yellow felt on the white felt, the needle is in the left position. Make more stitches where the cord is.


STEP 4
Take another yellow felt in the shape of a car and put it on the other side of the white car felt. Align both yellow pieces as much as possible. Sew the yellow felt on. Try if the cord is well attached.


STEP 5
Put the black wheels on one side of the car and sew them on.

STEP 6
Turn the car around and put another two wheels on the felt and sew them on.


STEP 7
Take the prepared page base and put on the road. Put the other end of the cord in between the page and the road. Make a stitch on the short edge of the road to fix the cord.


STEP 8
Distribute the yellow ribbons on the road. Pin them on the fabric page under the gray felt.


STEP 9
Sew the gray road on the page.
Start on the end where you already made a small stitch for attaching the cord.
When you come to the first ribbon, sew only the gray felt and the part of the ribbon that is under the gray felt. Finish the stitch, lift the sewing foot, and move it to the other side of the ribbon.


STEP 10
Continue sewing on the spot when you finished the stitch.
Sew along the entire road edge. This way, you will attach all 5 ribbons. Pull every ribbon a bit, to see if they are well fixed on the page.


STEP 11
Sew on both of the white felt rectangles. While you sew all the edges for the first rectangle, sew only tree edges of the “house” felt.

STEP 12
Sew on the red roof, and blue square. After that, sew the letter P on the blue square.

You finished the Biniboo Quiet Book Car Trip page. Congrats!


